Adjust Image Brightness
Click, paste or drag and drop files to edit
Select an image file jpg, png, webp
Drag and drop
OR
How to adjust image brightness online
Upload an image
Use the form above to load an image. Click the 'Upload image' button, copy and paste or drag and drop an image into the uploader.
Adjust
Drag the slider or edit the brightness value input field in the tool options bar to adjust the brightness level in the image.
Download or save
Export and download your edited image or save it to your account.
Learn More About Image Brightness
On this page
1. About Image Brightness
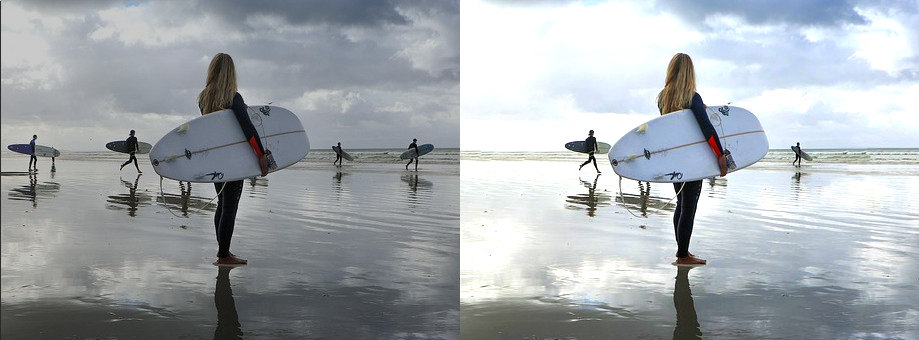
Easily adjust the brightness of your images online with the free online image and photo editor available at gifgit.com. Make image brightness adjustments with the online photo editor by simply dragging a slider to increase or decrease the brightness values in the entire image. Increasing the image brightness creates the visual perception of more light radiating from the scene in the image. Upload an image from your computer or use a sample image to try the brightness tool.
Image brightness refers to the overall lightness or darkness of an image. Adjusting the brightness can make an image appear lighter or darker, affecting the visibility of details and the overall mood of the image. Upload a photo from your computer or use a sample image to try adjusting the brightness with the online tool.
2. How Brightness Works
Brightness is a measure of the total amount of perceived light in an image.
When we observe a scene our eyes collect light that travels from a light source and
interacts with objects
in its path on its way to our eyes.
These light interactions include reflections, refractions or diffractions and they
determine the final image
we see.
The final amount of light that reaches our eyes, or brightness, is dependent on the
total luminance or
intensity of all the light sources
and the optical nature of the surfaces in an observed scene.
If you have zero or very little light in a scene you will experience complete or near
darkness such as in
the night.
On the opposite end you experience a very bright scene on a summer day when you need to
wear shades to view
your surroundings comfortably.
Similar to our eyes, the image a digital camera creates is a function of the light that
falls on the image
sensor in the camera.
The digital image stores the spatial color information along with the associated
intensity values of the
color components in units called pixels.
This information can later be loaded in a pixel based digital display for viewing.
When we make brightness adjustments to a digital image we are simply increasing or
decreasing the intensity
of the red, green and blue color components
of the pixels in an image by adding or subtracting a value to them. This approximates
the real world process
of changing the lighting in a scene.
Instead of physically changing the brightness of a bulb in a room we are approximating
the same effect in
the image by manipulating pixel values in software.
The demo below helps to visually grasp the effect of changing brightness on the pixels
in an image.
The graph to the right plots the intensity of the red component or channel of the pixels
along
the horizontal center line in the image to its left. You can drag the slider to
visualize how
the intensity plot changes in response to changes in brightness. You can also visualize
the green
and blue channels by clicking the appropriate radio.
By default an image is loaded in the editor with the brightness level assumed to be 100%. The 100% value is not an absolute measure of the brightness for all images. Whether you load a near dark night scene or a very sunny beach scene, the brightness will default to 100% for each case.
To adjust the brightness of the image in the editor a slider control (1) and number entry field (2) are provided in the tool options bar as illustrated below. Use the slider to achieve smooth transitions of image brightness as you drag the control. In doing this you can quickly get a rough estimate of the brightness level you want in your image.

The number entry field can be used for exact or fine adjustments to image brightness. Moving the brightness value toward 0% decreases the brightness or darkens the image until full blackness at zero. Setting the value higher than 100% makes the image brighter. Continually adding excessive amounts of brightness to the image will causes overexposure where the resulting image will appear to have large swaths of white or near white areas.
