
Crop Tool


Selection history
|
|
|
|
|
|
|
Aspect ratio:
| | |

|

|
✕ |


Contents
Crop your images and photos online with the online crop tool available in the free online image editor at gifgit.com.
Cropping allows you to create an image from within the current image.
You can focus on a desired subject in the image by removing unwanted areas and in so doing
define the dimensions and aspect ratio of the new image.
More often than not you will find that the crop tool is useful for fitting image content into a new
aspect ratio without stretching the image along the height or width.
With this online tool you can choose from several presets to get the right aspect ratio for your cropped photo.
Upload a photo from your computer or use a sample image to use the crop tool.
- Upload an image using the form above to load it in the online editor. If you already have an image opened in the editor select the crop tool by clicking its icon in the toolbar.
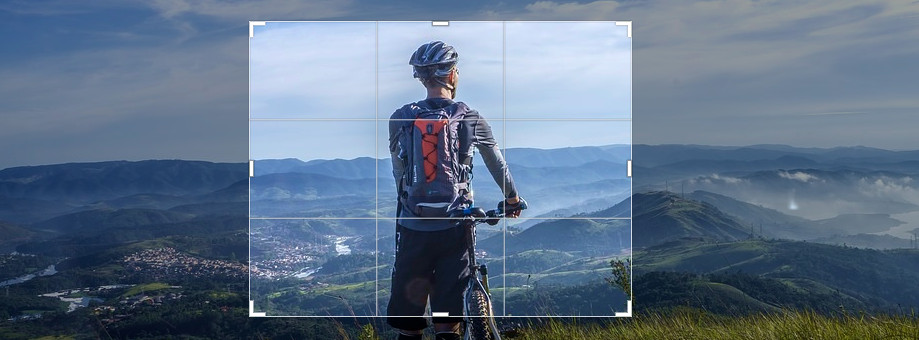
- To begin the selecting press in the image to set the starting point of the crop rectangle. With the mouse still pressed drag to surround the desired area. While dragging you will observe the dimensions of the rectangle being adjusted to fit between the start point and current mouse point. The selection is completed when the mouse is released. A dashed box indicates the region that is contained within the crop rectangle.
- Hover the mouse over the crop rectangle to show the control handles that can be used to change the dimensions and location of the crop rectangle by pressing and dragging them.
- When you are satisfied with the selected crop area press the 'Crop Image' button to crop your image.
The crop tool is a simple tool that works like the rectangular marquee tool.
All you have to do is draw a rectangle in the image that covers the image area you
wish to keep.
Areas outside the rectangle will be trimmed away to create the new image.
When the crop rectangle is drawn you can adjust its width, height and position using
the control handles.
The 10 control handle regions are as follows:
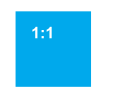
Below is a thumbnail preview of the aspect ratio options for the crop tool:
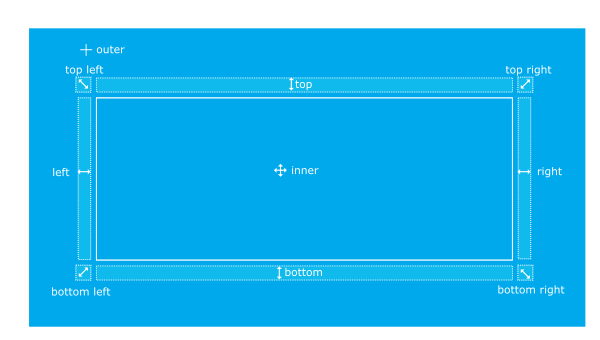
Crop Handles
Control handles are areas in and around the drawn crop rectangle that can be pressed and dragged to resize or reposition it. Edge handles are just outside the top, left, bottom and right edge. There are also handles for the four corners of the crop rectangle. The areas inside and outside are also used to alter the crop rectangle. As you move the mouse you will notice changes to the cursor when a crop rectangle is already drawn in the editor. The cursor indicates how the handle can alter the existing crop rectangle. The crosshair outside the crop is a little different. It doesn't manipulate the current crop rectangle but is used to draw a replacement crop rectangle.The 10 control handle regions are as follows:
- inner - moves the crop rectangle.
- outer - press and drag to create a new crop rectangle that replaces the current.
- top - changes the height of the crop area while simultaneously changing its y position.
- left - changes the width of the crop area.
- bottom - changes the crop area height.
- right - changes the width of the crop area while changing the x position.
- top-left - changes width or height of crop rectangle, may change either the x or y top-left positions or both.
- top-right - changes the width or height of crop, may change the y position.
- bottom-right - changes the width or height of crop.
- bottom-left - changes the width or height of crop, may change the x position.
Aspect Ratio
The crop tool also has an option to set the aspect ratio of the crop area. The default 'Unfixed' option allows you to draw a crop area with a width and height that are not contrained to a set ratio. This means the height and width are independent and changing one doesn't affect the other. The other aspect ratios do not behave like this because they constrain the width and height to a set ratio between the two. This is useful when you need to keep a set dimensional proportion in the resulting image. For example, if you set the 'Aspect ratio' option to 'Image' the crop rectangle will be drawn with the same width to height ratio as the original image. The other aspect ratio presets are used to apply width to height ratios that are popular in photography.Below is a thumbnail preview of the aspect ratio options for the crop tool:
- Aspect ratio: Sets aspect ratio that the crop rectangle will be drawn with.
Feature Rich Online Image Editor
Online photo editing with layers, layer masks, a workflow and user interface like a traditional desktop photo editor that provides you with the toolset and
features to professionally edit your images. No need to download or use desktop software like Microsoft Paint, Photoshop or GIMP to do quick edits. Edit your images online
with the best online image editor.
| Features | Gifgit Editor | Lunapic |
|---|---|---|
| Browser based editing (No software download) | Yes | Yes |
| Layers | Yes | No |
| Layer Masks (Non-Destructive Editing) | Yes | No |
| Selection tools | Yes | No |
| Undo History List | Yes | No |
