Dodge Tool
Click, paste or drag and drop files to edit
Select an image file jpg, png, webp
Drag and drop
OR
How to Use the Dodge Tool
Upload an image
Use the form above to load an image. Click the 'Upload image' button, copy and paste or drag and drop an image into the uploader.
Adjust
Adjust the settings in the tool options bar to set the size of the dodge tool.
Download or save
Press and drag in the image to lighten areas in the image.
Learn More About
the Dodge Tool
On this page
1. About the dodge tool
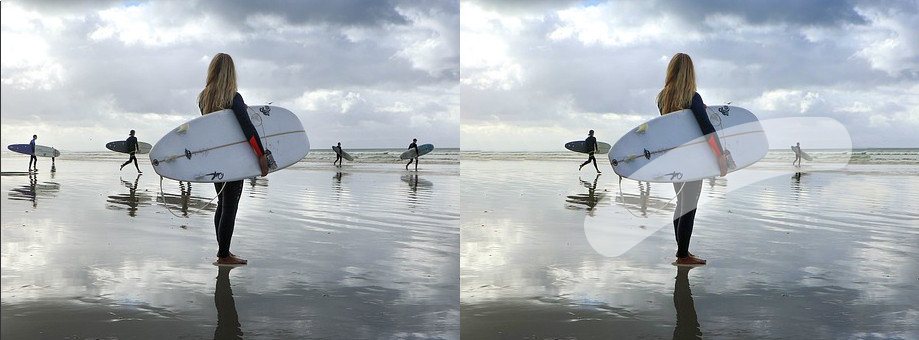
The dodge tool can be used to enhance photos by selectively adding highlights to areas in the image. Before there were software tools to digitally edit images, photographers used clever darkroom techniques to lighten image areas. This involved using a stencil to lessen the amount of light reaching the photographic paper during the photo development process. The blocked areas would receive less than normal exposure which would result in lighter areas. With the advent of digital image editing this technique can be recreated in software and on gifgit.com you can dodge images online in your browser. Lighten areas in your image with the dodge brush tool available in the online image editor at gifgit.com. Upload an image from your computer to use the dodge tool.
2. How the Dodge Tool Works
2.1 Selecting the Dodge Tool
To load the dodge tool locate and click the lollipop looking icon found in the toolbar above the editor canvas. When you click the icon the editor loads to the dodge tool page in the online image editor and the tool options bar will be populated with options for the dodge tool.
2.2 Lightening with the Dodge Tool
With the dodge tool selected you can stroke the image to lighten desired areas. The dodge tool operates like a brush with size and blur settings for the stroke that can be found in the tool options bar. These control the thickness and hardness of the stroke respectively.
Use stroke sizes that are appropriate to the area you are lightening. If the brush size is too small you will end up repeatedly stroking the image causing overlapping strokes. This will compound the lightening effect where the strokes overlap and result in striations in the lightened area. Work with a brush size that will adequately cover the largest portions of the area you'll lighten then reduce it to fit into smaller subregions.
Brush hardness is controlled by the blur field in the tool options bar. If you soften the brush strokes by increasing the blur the edges of the dodge stroke will be less abrupt. The areas lightened by the stroke will transition smoothly to the rest of the image. This may be a more desireable effect as opposed to using a hard brush where the stroked areas would be distinct lines in the image.
2.3 Adjusting Exposure
The primary setting for the dodge tool is the exposure in the tool options bar. The exposure controls how much lightening is applied when you stroke the image. The amount of exposure you want in the area you stroke is more of a trial and error so stroking then adjusting the exposure may be needed to get the correct exposure you need.
