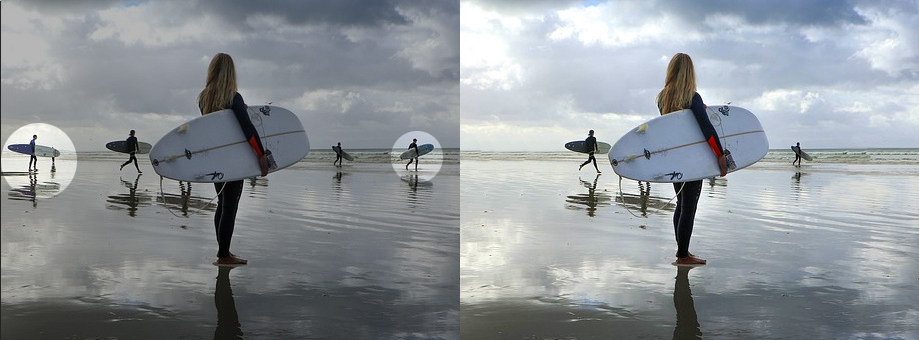
Clone Stamp Tool


- Upload an image using the form above.
- Press 'Alt' and click the image to define the clone starting point and area.
- Adjust the settings in the tool options bar to set the size and behaviour of the clone stamp tool.
- Stroke the image with the clone stamp tool to copy the image from the clone point to the destination area.
Setting the Sample Point
You will notice that when you select the clone stamp tool and make a stroke, nothing happens. This is because just like in any copying and pasting routine, you first have to set or select the region you're going to copy. To begin 'cloning' with the clone stamp you have to set a starting point in the image for the clone stamp brush to clone from. This is called the clone point or sample point. You set the sample point by pressing the Alt key and clicking the image at the point you want to start copying from. When the starting point is set a brush profile outline will surround the starting point to show the area you are cloning from.Cloning with Strokes
After you set the sample point you can begin cloning areas in your image. If you do a simple click of the image in another location the area around the copy point and within the boundary of the brush profile will be copied to the new location. This is how the clone stamp tool copies. If you drag the mouse in the image the area around the clone point covered by the stroke will be copied to the new location. How the clone stamp copies from stroke to stroke is determined by the alignment.Alignment
The alignment is set by the aligned checkbox in the tool options bar. By default the checkbox is unset and clone stamp tool is not aligned. In this mode the sample point will always remain the same from stroke to stroke. When unaligned every time you stroke the image at a different point the copy will start from the same unchanged sample point area. This is sefull when you have a sample point area that you would like to clone in multiple points. For example, if you have a face that has multiple pimples and you find a suitable part of the skin that is blemish free, it is likely that you will want to duplicate it over the other areas repeatedly.In the aligned mode the sample point will be at a constant offset distance. This offset distance is set when you make the first mousedown after you set the sample point.
Clone Stamp Tool Tips
Owing to the fact that the clone stamp is essentially an area replacement tool there are several factors to consider for optimal results. The replaced area should seemlessly blend in with the sorrounding so that it isn't easily recognized or distinguished without meticulous inspection. Even if you cannot completely achieve this the ultimate aim should be to replace the area such that the image does not appear to be 'doctored' when viewed by the casual observer. For best results the following must be considered:-
Color
The color of the sample area must match the sorrounding color in the applied area. When setting the sample point you should look for an area that has a similar color to the area you want to replace. This may sound like a trivial task but judging colors in an image with the naked eye can be tricky. It's like guessing music notes by ear. Many natural images contain shades and gradients of color. You will often be surprised at how a relatively close sample area with similar looking color appears much darker or brighter when applied in a new area. This has to do with how our brain processes objects and colors. It tends to generalize and oversimplify subtle changes when we associate color with objects. If we see a lemon we process the whole lemon as yellow and we take little notice that the shaded areas of yellow are actually transitioning to brown. This causes us to underestimate how different colors in two areas that appear to be similar can be.
If your sample area doesn't match the sorrounding color its best to use another sample area. You may have to click around several times until you get the best match. You could also try changing the opacity of the clone stamp brush and/or reduce its hardness by increasing the blur. By reducing the opacity you allow the sample area to mix more with the background area. Reducing the hardness smoothens the transition between the painted sample area and the existing background.
-
Pattern
Patterns are generally made of repeated units that fill a region. Nothing can be more visually irritating than an area with a clearly visible pattern discontinuity. Its like that bad pixel in your HD TV, you have a beautiful picture but that one pixel is there staring at you, constantly. When working with patterned areas you must be careful to keep consistency in the repeated pattern unit. The larger the repeated pattern unit is relative to the image the more irregularities will show up if the clone stamp tool is not used carefully. Take a brick wall for instance, say you decided to clone stamp out a vase from a shelf in front of it. If an observer sees a sudden vertical jump in the horizontal brick mortar lines or the bricks in an area seem to be unexpectedly truncated, your edit will look shabby and amateur. When working with patterns you should make sure that the pattern lines are not broken and that the repeated cells are preserved.
The nature of the pattern has a huge impact on how easily you can duplicate it into another area. Generally, the more geometric and regular a pattern is the more careful you have to be when using the clone stamp tool. A cobblestone road of approximately round rocks should be easier to edit than one that contains hexagonal or rectangular ones. Patterns with some level of irregularity may hide mistakes you make if you edit without being too careful.
-
Texture
Working with textures can be approached in the same way as working with patterns if you treat them as irregular patterns. Textures are usually small grained with irregular shapes and/or randomly sized lines of varying thickness, walking paths and orientations. Cloning these textures hardly produces pronounced discontinuities once you choose a sample region that matches the characteristics of the grain or pattern of the background. If the cloned area stands out too much from the background you can try softening the edges of the clone stamp brush or choose another sample point.
- Size: Sets the diameter of the clone stamp brush stroke.
- Blur: Sets the blur of the clone stamp brush strokes. The lower the blur the harder the brush strokes.
- Opacity: Determines the opacity of the the clone stamp in a range of zero for completely transparent to one hundred for fully opaque. A high opacity causes the strokes to completely hide the image behind it. Setting low to medium opacity allows the clone stamp strokes to blend with the part of the image it is brushing over.
- Blend Mode: Determines the blend mode of the stroke when applied to the image.
- Aligned: When checked, clones a part of the image at a set offset from the cursor.
Feature Rich Online Image Editor
| Features | Gifgit Editor | Lunapic |
|---|---|---|
| Browser based editing (No software download) | Yes | Yes |
| Layers | Yes | No |
| Layer Masks (Non-Destructive Editing) | Yes | No |
| Selection tools | Yes | No |
| Undo History List | Yes | No |


